
Automating Document Organization in Claims Management with MS Power Automate
Eliminate manual tasks in claims management by automating folder structure creation with SharePoint and Power Automate. This method ensures every new claim is organized efficiently, sidestepping the need for repetitive copying, pasting, or template searching.
Folder Structure : MS Excel
This initial phase lays the groundwork for automation by establishing a clear, consistent template for document organization.
Outline the Folder Structure: Decide on a comprehensive folder structure that suits the types of documents involved in claims management. This might include categories like invoices, contracts, correspondence, and more.
Leverage Excel Online for Mapping: Utilize an Excel Online spreadsheet to detail the folder structure template. This document will act as a reference for Power Automate, guiding the automatic creation of folders in SharePoint.
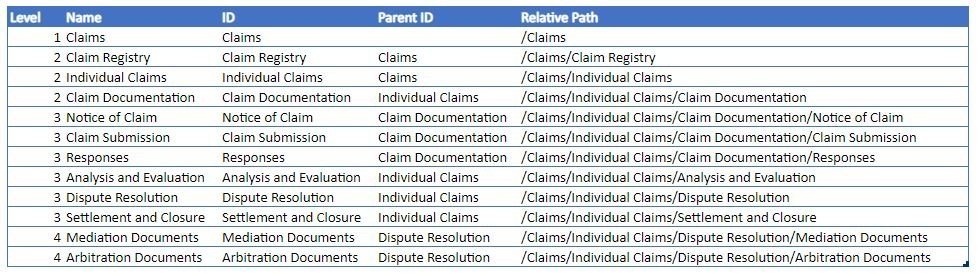
Excel Table: Prepare a table with the following columns - Level, Name, ID, Parent ID and Relative Path. The Parent ID is the ID of the folder immediately above in hierarchy.
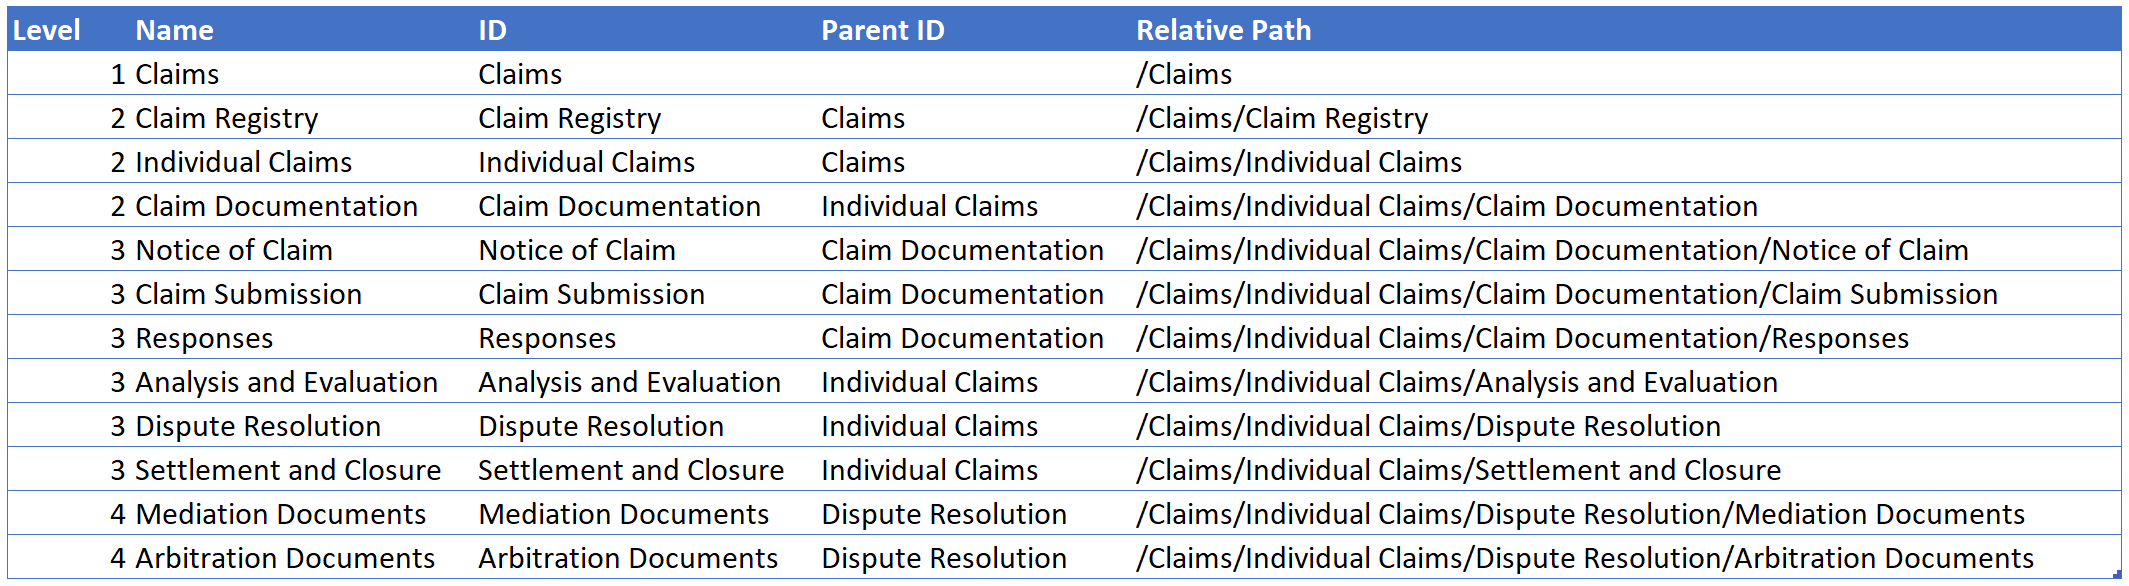
Example Excel Table With The Desired Folder Structure.
Saving data in an Excel table is crucial for seamless integration with Power Automate. When data is organized within an Excel table, it ensures that the Power Automate flow can effectively recognize and process the information.
Database Setup : SharePoint List
Set Up Your Database in SharePoint list: Prepare your claims database within SharePoint list (you can use any other database such as SQL or Dataverse or even Excel), ensuring each claim is allocated a unique identifier. This setup is crucial for linking each claim to its respective folder structure automatically.
Setting up your database in a SharePoint list is a pivotal step for streamlining claims management. This database serves as the foundation for organizing claims data effectively, allowing for detailed record-keeping right from claim receipt. It's adaptable to various database systems, including SQL, Dataverse, or Excel, but using a SharePoint list offers a straightforward, integrated solution.
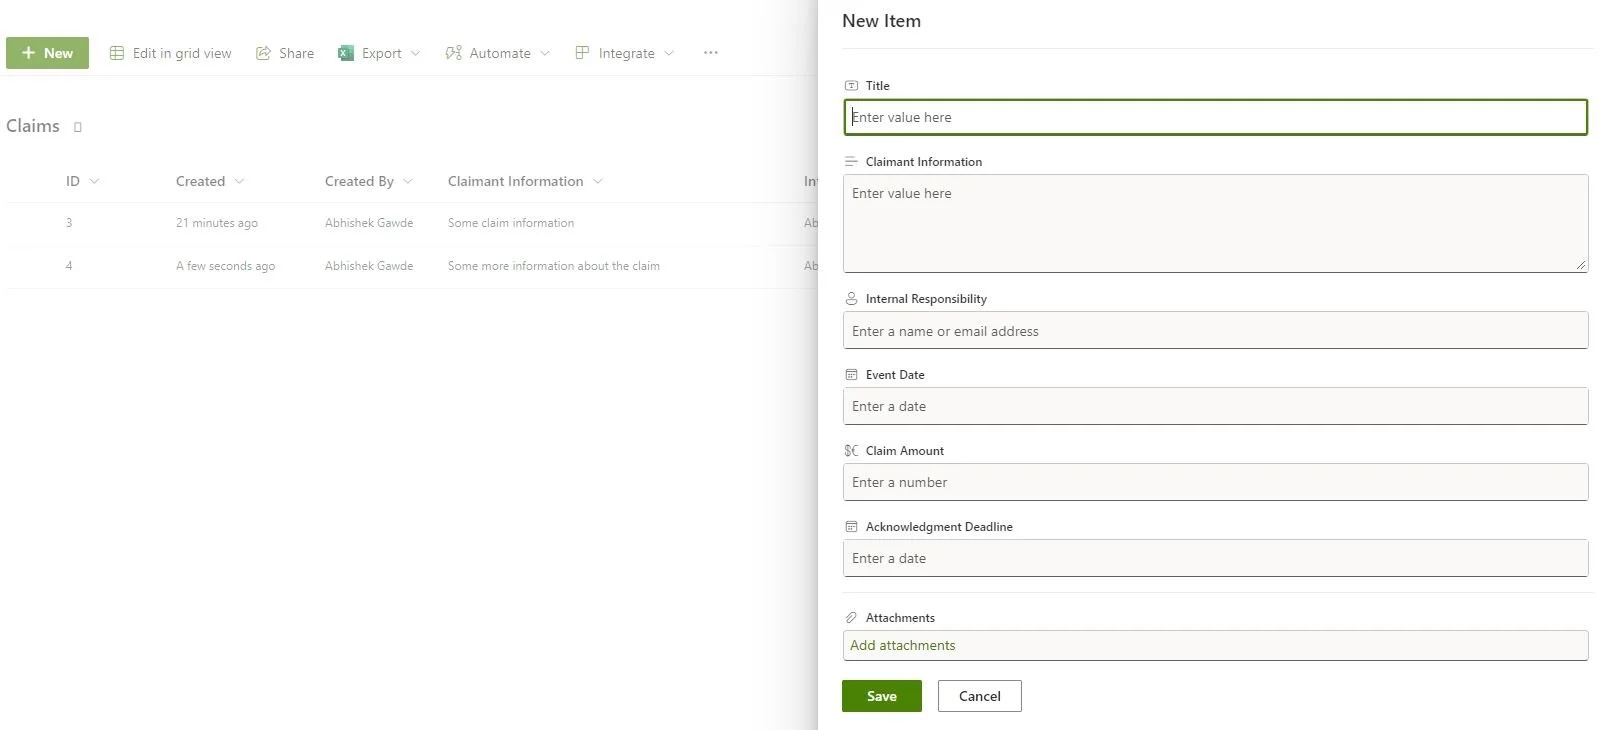
Key Data Points to Capture:
Claimant Information (Text): Who has made the claim?
Internal Responsibility (Person): Who within the organization is handling the claim?
Event Date (Date and Time): When did the incident leading to the claim occur?
Description (Multiple lines of text): A brief overview of the claim.
Acknowledgment Deadline (Date and Time): The final date by which the claim must be acknowledged.
Claim Amount (Currency): The financial value of the claim.
Claim ID (Integer): Auto number
With a SharePoint List in place, businesses can leverage Power Automate to trigger workflows based on new entries. This approach not only streamlines the process of managing new claims but also ensures that every claim is allocated a unique identifier—crucial for linking each claim to its respective folder structure automatically.

Claims : SharePoint List
External link: How to Create a Custom List in SharePoint Online
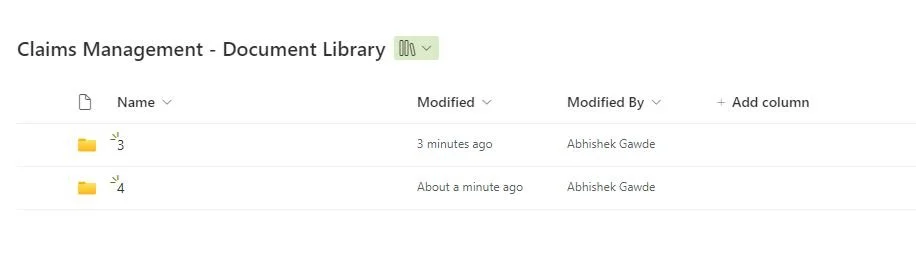
Document Library : SharePoint
A SharePoint document library is required where the folder structure will be created.
External link: Create a document library in SharePoint
Folder Automation : Power Automate
With the structure defined, the next step uses Power Automate to implement this organization across all new claims.
External link: How to create a Flow in Microsoft Power Automate
Integration with SharePoint: Set up a trigger in Power Automate that activates when a new claim is logged in SharePoint list. This trigger should pull the unique identifier for each claim to create a dedicated folder structure.

Automate Cloud Flow : Triggered when an item (claim) is created in the SharePoint list defined above.
Go to https://make.powerautomate.com.
Select Automated cloud flow.
Provide a suitable name such as “Create folder structure for new claims”.
Choose “When an item is created” as the flow’s trigger.
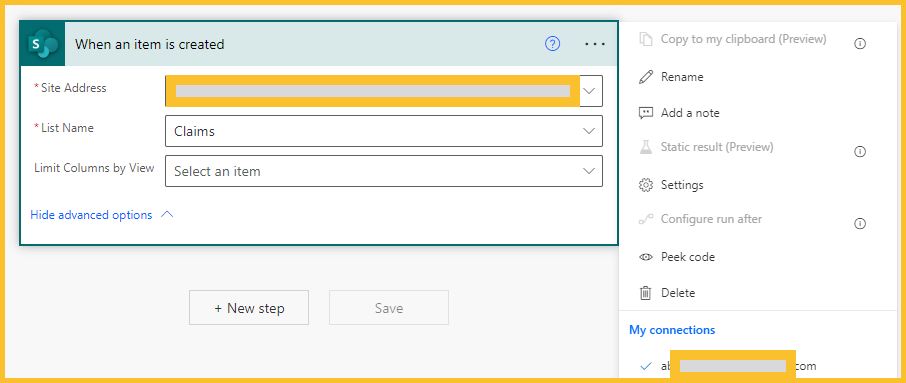
Flow Trigger: When an item is created
Create or use existing connection using your Microsoft Office account to connect to the SharePoint List.
Select the SharePoint site from the drop down.
Select the list created in the SharePoint site.
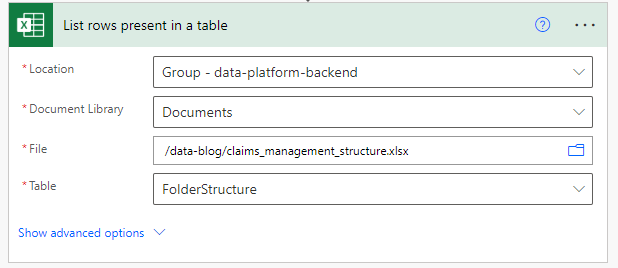
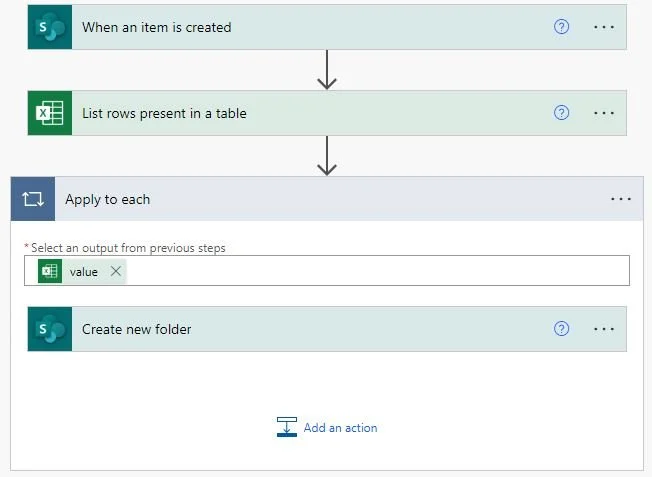
Flow Step: List rows present in a table
Select the Excel file with the folder structure defined in the table.

Flow Step: Apply to each
Loop through each of the row in the Excel table fetched in the previous step.
Select the “value (List of Items")”, the output from the previous step.

Flow Step: Create new folder
Add a step “Create new folder” inside the “Apply to each” step.
Select the SharePoint site and Document Library where the folder needs to be created.
Select the ID from the previous step “When an item is created”. This will create a top level folder with the ID.
Then select the “Relative Path” dynamic value from the previous step which references to the column Relative Path in the Excel table.
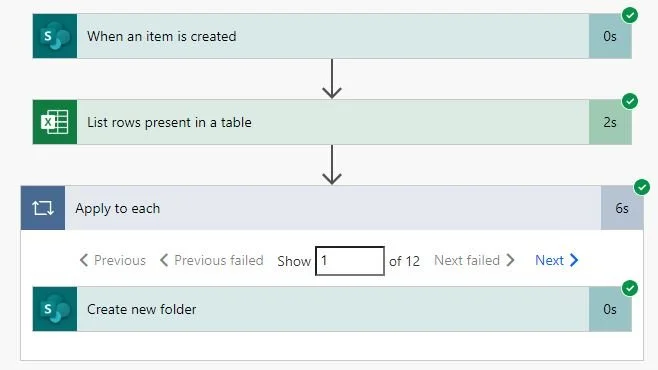
Power Automate Flow - Create Standard Folder Structure For Every New Claim Registered
Conclusion
In summary, automating the creation of folder structures for claims management with SharePoint and Power Automate not only streamlines document organization but also significantly enhances operational efficiency.